GNS3 is a powerful tool to simulate computer networks. Many images are ready to use right after the basic setup. However, sometimes we have to put in some more work to make everything work as expected. In this article, we will go through the basic setup of the Nokia VSR VM in the GNS3.
Basics
For this article, we will use the Nokia VSR 21.5. You can download it from the official website.
To make everything work as expected, you need to have a valid license.
License
First of all, we need to take care of the license, because without it, the VSR machine won’t have all the functionalities we need. There are multiple ways to provide the license to the VSR, but for this article, we will inject the license file into the qcow2 image, so the VSR will have access to it after booting up. To achieve that, we will use the guestmount application on Linux. We will mount the qcow2 image to the directory, and then we will copy the license file.
First of all, let’s jump to the directory with the qcow2 image and license.
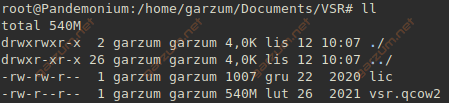
Now, we have to mount it. The /mnt directory was chosen as the mounting point.
root@Pandemonium:/home/garzum/Documents/VSR# guestmount -a vsr.qcow2 -m /dev/sda1 --rw /mnt/Now, we can access the content of the qcow2 image. Let’s list the files first.
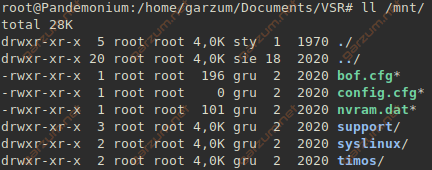
If you’re familiar with the SR-OS, you probably recognize the filenames and the directories. The content of this directory can also be accessed inside the SR-OS, it sees it as a compact flash: cf3.
Let’s copy the license to the qcow2 image.
root@Pandemonium:/home/garzum/Documents/VSR# cp lic /mnt/Let’s list the files once again to see if the license is there.
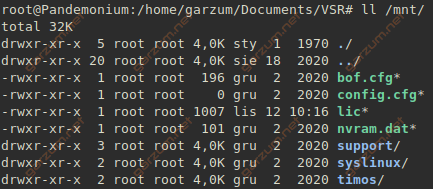
As you can see, the license file lic is here. Now we can unmount the image.
root@Pandemonium:/home/garzum/Documents/VSR# unmount /mntAnd we’re done, we’re ready to add the image to the GNS3!
GNS3
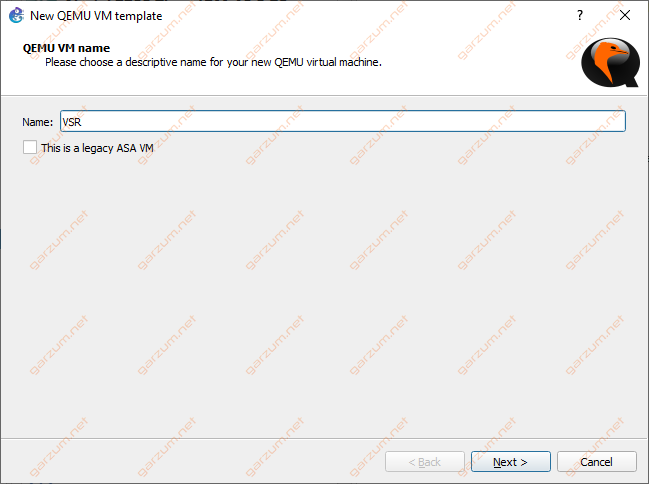
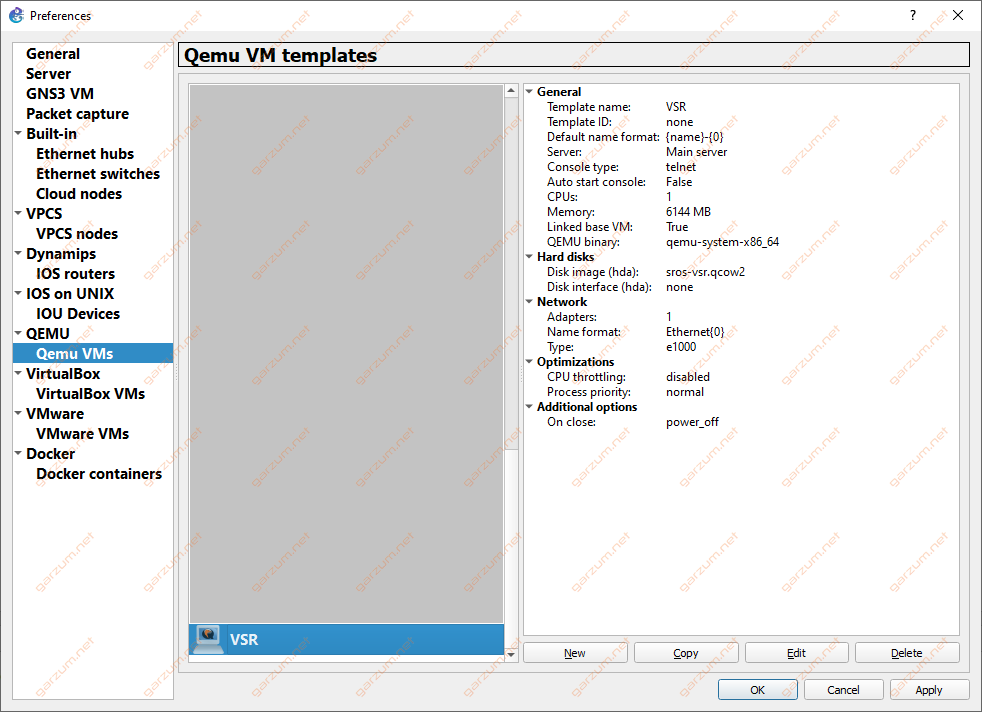
To add a new VM, we need to jump to the Quemu VM’s list. We can find it under Edit>Preferences>Quemu VMs. Here’s a list of VM’s that are using the qcow2 images. let’s add a VSR VM by clicking New.
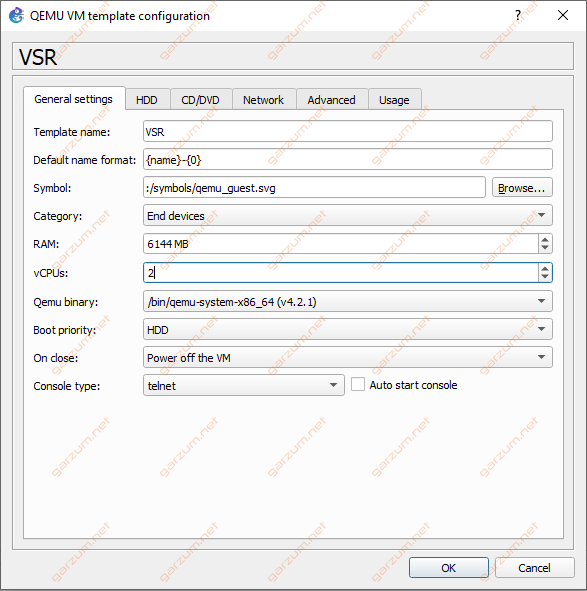
Now we have to go through the VM creator and provide essential data. First of all, we have to specify the VM name, VSR in this case.
Next, we have to specify the amount of RAM for the VSR VM. I recommend setting 6144 MB. If it’s too much for you, you can try to set a smaller value, but keep in mind, that it can cause your VSR VM to crash.
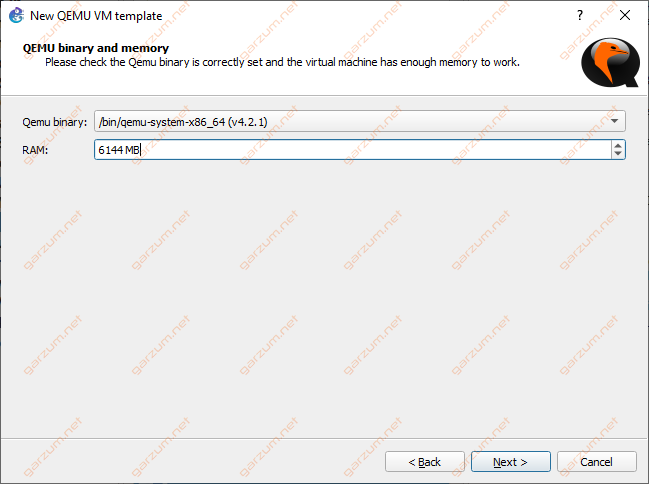
The console type is set to telnet by default.

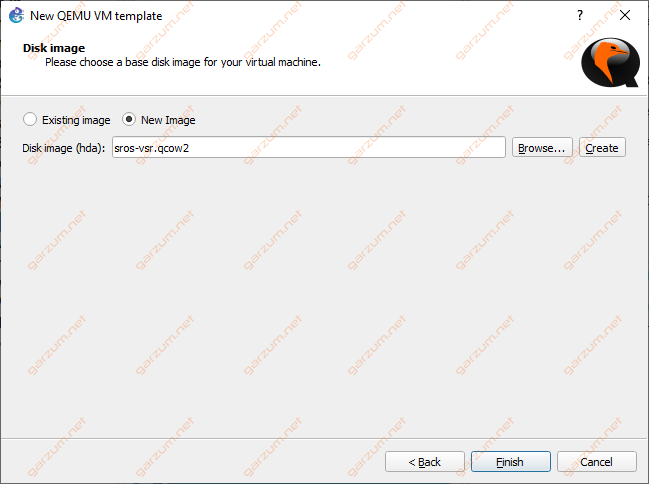
Now we have to locate the VSR qcow2 image.
After that, our VM is visible on the list of available VM’s in the Quemu VMs section, but it’s not the end of the configuration. We still have to do some modifications. Let’s jump the template configuration by clicking Edit.
First of all, the VSR needs to have more than one vCPU. In this case, 2 are configured. You can also change here the VM symbol or the category as you like.
In the Network section, we have to configure the network interfaces for the VSR. Summarized changes are presented below:
- Adapters: 20
- First port name: A/1
- Name format: 1/1/{0}
- Type: vmxnet3
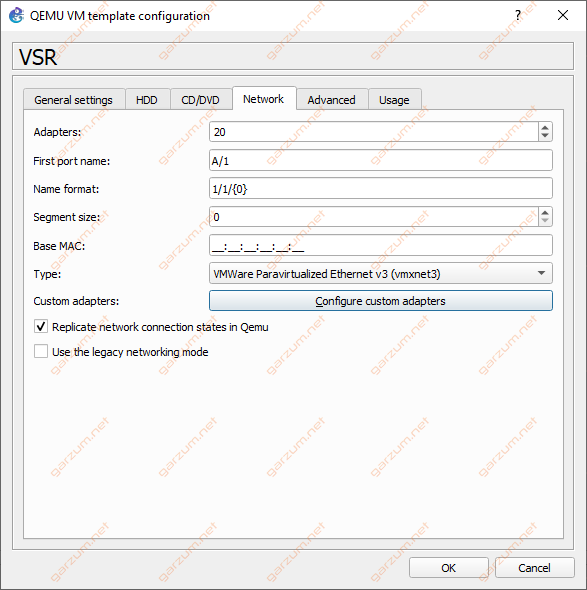
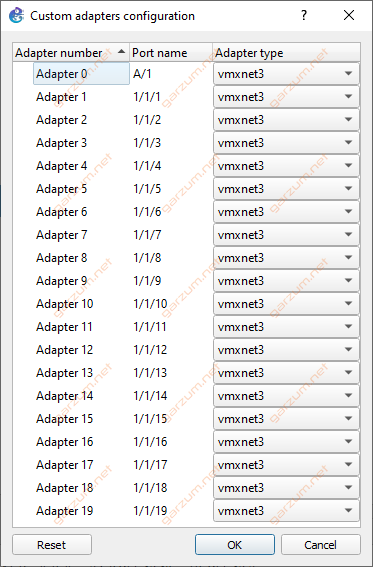
We also need to change the adapters name, to match numeration on the VSR. GNS3 by default starts counting from 0 in opposite VSR, which starts from 1. So we have to adjust that as shown below.
The first adapter is used by the CMP, the rest are used by the MDA.
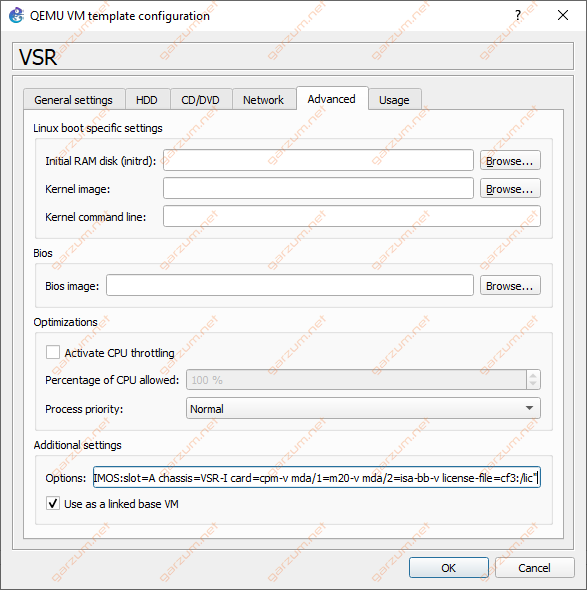
The last adjustment is in the Advanced tab. We have to specify some VSR options such as UUID, virtual hardware, license file path. In the following example, we will use one card with two MDA’s. One for physical connectivity, and the second for ISA operations.
-machine accel=kvm -serial mon:stdio -nographic -boot order=c -cpu host -uuid <ReplaceBracketsWithUUID> -smbios type=1,product="TIMOS:slot=A chassis=VSR-I card=cpm-v mda/1=m20-v mda/2=isa-bb-v license-file=cf3:/lic"Remember to replace angle <> brackets with your own UUID, that you have the license for. As you can see, we’re specifying the license path as cf3:/lic, so the VSR sees the content of the qcow2 image as a CF3 card.
The prepared string needs to be placed under Additional settings.
And that’s all. You’re ready to use your VSR image in the GNS3 topologies!
I would like to thank Roland Kuliszewski for sharing with me many details about the VSR architecture.